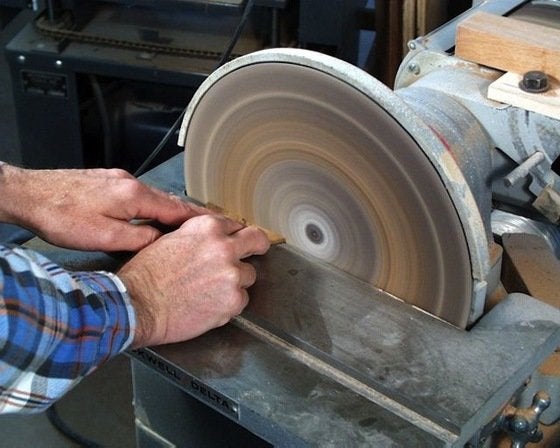
You should sand your wood project as smoothly as possible before you apply a finish. Various techniques work, but there is no one single fastest way to sand wood. This article will cover a variety of methods such as a random-orbit or belt sander and a pumice rock. Below are some of the more common methods. Continue reading to find out more about each.
Use a random orbit sander
Because of their different levels of pressure, speed and speeds, random-orbit orbit sanders work better than belt sanders when sanding wood. They will provide a smoother finish when used properly. You must use them properly and move them around the surface constantly. Also, improper use could cause harsh abrasions which can make the job of smoothing more difficult.
Using a belt sander
A belt sander is a great time-saver when sanding wood. One pass across an area will create successively smaller scratches. The grit level of the sandpaper determines how deep a scratch will be. Fine scratches that are 60-80 grit can usually be removed in less than a minute. However, it may take hours to remove deep scratches.
Use a pumice rock
A pumicestone is an excellent choice for sanding timber. This natural rock is inexpensive and comes in varying grits. It is great for removing scratches and dents from wood, but not good for creating super-fine finishes. To prevent the stone from getting clogged, soak it in water before you begin sanding.
Use a hand plane
A handplaner can smoothen a surface in a fraction the time it takes for a belt-sander. The blades create a continuous cut in wood. A planer requires less concentration to achieve smooth surfaces. Hand planes may not be as effective at removing bulk, and you will need experience to avoid tear out. Jack planes are an excellent choice for beginners. They can handle both bulk removal as well as smooth shavings.
Using steel wool
Use a steel sander to sand a small area. It's best to not overdo the work and end up with an uneven result. To clean wood surfaces you can use mineral spirits. The mineral spirits can be used to dampen the cloth and give it a new color. This will eventually brighten the surface. As the steel wool gets dirty, you can change the cloth surface and repeat the process.
FAQ
How do I know what tools are best suited for me?
It's important to consider your preferences and needs when buying tools. Do you prefer metal or plastic handles? What size nails and screws do you usually use? Are you more comfortable using power tools than hand tools?
What tools should I start with when becoming a woodworker?
Woodworking requires patience and practice. Learning how to use the various tools and techniques necessary for woodworking takes patience.
There are many options for woodworking equipment today. Some prefer to use power tools and others prefer hand tools.
Your choice, however, is up to you. However, you need to ensure that the tool you use is the right one for the job. You might start with a simple set of tools if you don't have much experience.
You might also want to learn how a router works, which allows you to cut wood into intricate shapes. These are available at most hardware stores.
Is it possible to refinish your own furniture?
Yes! You don't have to hire a professional to refinish furniture. There are many ways you can do it yourself. Here are a few ideas:
Use sandpaper for removing stains and scratches. Then wipe down the surface with a clean cloth.
Apply clear polyurethane paint. Allow furniture to dry completely before you move it around.
Acrylic paint is a great way to paint furniture.
You can stain the furniture instead of using paint. The stain will give the furniture a rich look.
Apply shellac wax. Wax will protect the wood and add shine.
Where can I begin with woodworking
You can learn the most effective way to build furniture by actually building it. While you will need tools, mistakes are inevitable, but you will learn the ropes if you persevere.
Begin by choosing the project that you want to finish. You could make something as simple or complex as a box. Or you could build a whole entertainment center. After you have decided on a project to work on, contact a local woodworker that specializes in this type of work. Ask them for suggestions on the tools you will need and where to buy them. It's possible to ask your friend if they do this type of work.
What's the time taken to finish a piece furniture?
It all depends on how large the furniture is. Boxes and picture frames are small projects that can be completed in one day. Larger projects such as tables and desks can take several days to complete. It takes time in order to properly stain or seal the wood.
Statistics
- The best-paid 10 percent make $76,000, while the lowest-paid 10 percent make $34,000. (zippia.com)
- Most woodworkers agree that lumber moisture needs to be under 10% for building furniture. (woodandshop.com)
- Woodworkers on the lower end of that spectrum, the bottom 10% to be exact, make roughly $24,000 a year, while the top 10% makes $108,000. (zippia.com)
- Overall employment of woodworkers is projected to grow 8 percent from 2020 to 2030, about as fast as the average for all occupations. (bls.gov)
External Links
How To
How to make wooden joints
This tutorial will show you how to join two pieces of wood together. We'll use the "pocket hole joint," which means we drill holes in the wood and then glue them together. This method is great if your wood's straight and smooth. Try dowel joinery instead if your wood doesn't look straight. Here are the steps
-
Drill Pocket Hole Joints. Start by measuring and marking the spot where the pocket hole joint will be placed. Use a jigsaw or handheld drilling machine to drill 3/8 inch deep holes at the ends of each wood piece.
-
Sand Smooth. Sanding the wood's edges will help ensure that the joint won't split later.
-
Glue Together. Apply glue to the sides of both wood. Allow the wood to rest for five minutes before clamping it together.
-
Attach the Pieces together. After the glue has dried properly, clamp the pieces together to make sure they are flush.
-
Trim Joinery. Trim the excess wood around the joint after the glue has dried completely.
To be able to turn the pieces inside-out, leave enough room between them.