
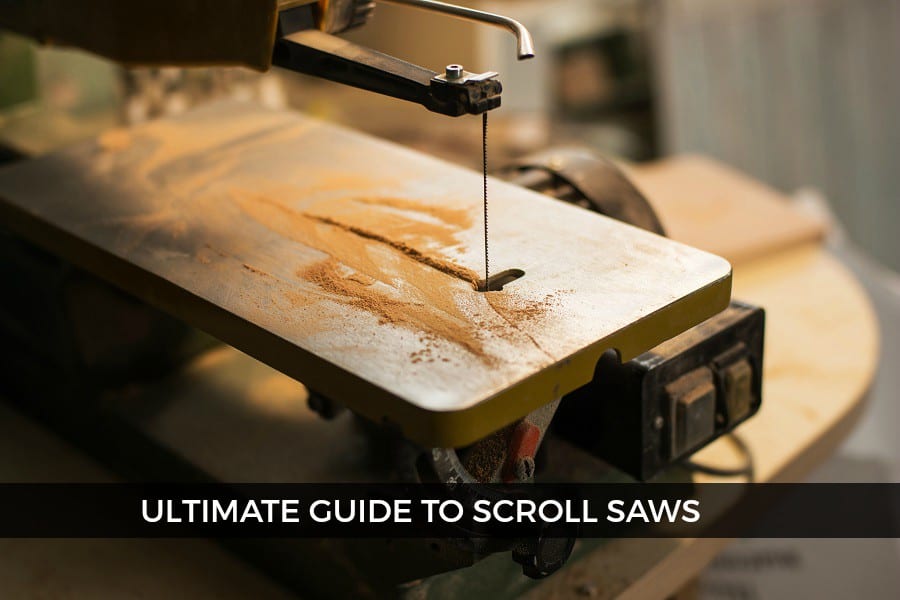
Scroll saws are a great tool for crafting, but if you don't know how to use them properly, you may end up frustrated. Learn the basics before buying your first scrollsaw. You will learn how to stack pieces, change blades, and choose the right blade. Follow these steps to get your scroll saw creating the coolest things. If you have any questions, please don't hesitate to contact me.
Safety precautions
Safety precautions when using a scrollsaw are basic but important. You should wear safety glasses. Wear tight-fitting clothes and keep your hair neat. When operating the scroll saw, it is important to avoid jewelry and rings. Follow the instructions and guards on the machine. Also ensure the table is level. Also, please be careful while operating the scrollsaw.
A bench brush, which is one of the most popular safety tips for scrollsaws, is a good idea. A bench brush will clean the blade and table. It is important to ensure that your blade is secure and sharp. A bench brush is not necessary if you don’t own an aquarium pump. An aquarium pump is inexpensively available at your local pet shop. To prevent rusting, a good safety precaution for scroll saws is to keep their blades oil-coated. The blades are subject to the same rules: dry wood will make the blades less durable.
Chosen a blade
It can be confusing to choose a blade for your scrollsaw. However, there are many things you should consider before you start your first project. Many scroll saw users will test many blades before buying the right one. There are two types of blades available: pin-end blades and pinless. You can find out more in the Scrollsaw Woodworking and Crafts forums. For some helpful tips and tricks, check out the Scrollsaw Woodworking and Crafts Forums.

Consider the complexity of your cutting pattern before you buy a scrollsaw blade. Larger, more intricate patterns require a thinner blade than those with smaller, simpler patterns. In these cases, you'll want to choose a blade with smaller teeth. On the other hand, a narrower, thicker blade is better for less-complex patterns. To determine the correct blade thickness, always refer to the universal number code.
Changing blades
While changing blades on a scrollsaw is easy, it is essential to read and follow the instructions. These instructions can either be found in a scroll saw user manual or an online manual. These manuals may be downloaded free of charge. Before you begin changing blades on your scroll saw, unplug it from the power source. Loosen the two screws on the blade mounts and then remove the old blade. After removing your old blade, you can tighten them and replace it.
First, remove your table insert. Before changing the blade, take off any protective equipment or guards. If the blade mount is not removable, you may need to remove it using the thumb screws provided. The blade is usually installed with the teeth facing downwards. However, there are blades that have teeth facing both directions. Follow all instructions in your scrollsaw manual.
Stack cutting
Stacking is a popular scroll saw technique that lets you cut multiple layers of thin material. Stack cutting involves wrapping each piece with tape and drilling holes in the stacks. This method produces multiple finished projects. Although the exact number of layers depends upon the type of scrollsaw and blade, it is good for basic ornament patterns. A router can be used to cut multiple layers simultaneously for more complicated projects.
A constant tension Scroll Saw can be used to cut metals. It is capable of making turns that are slightly larger then the blade's length. It is impossible to cut perfectly square corners in one pass. The outer corner can be cut in either a diagonal or in a different direction. This will result in a sharp edge and minimal sanding. Although a scroll saw with constant tension can cut outside corners, it won't cut them very sharply.
Use a scroll saw
Be sure to learn how to safely use your scroll saw. Unlike a regular saw, this tool does not produce perfect cuts. It should be used slowly and steadily. It is a good idea to slow down and make sure you are not cutting too fast. When you are done cutting your material take the piece out and clean it up. Here are some safety tips for using a scrollsaw safely.
Make sure that the material you are using for the scrollsaw is suitable. First, ensure that the workpiece you are using is sufficiently thick to support the blade. If your workpiece is too thin, you may end up destroying the blades. You can use the scroll saw to create a pattern. To stick the photocopy to the piece of wood, you can also use general-purpose spray adhesive. To prevent the blades from getting stuck in the material when you are cutting straight lines with your scroll saw, first drill a small hole in the workpiece.
FAQ
How long does it take to finish a piece of furniture?
It all depends upon the size of your piece of furniture. A smaller project like picture frames or boxes can be completed in a single day. Larger projects such as tables and desks can take several days to complete. It takes time for the wood to be stained and sealed properly.
How do I learn basic woodworking skills?
The best way to learn how furniture construction is to make your own bench. This project can be completed with whatever wood you have available at home. You don't need to know which type of wood you should use. Instead, get some pine boards at Lowes or Home Depot. After you've constructed your bench you'll want sand all the rough edges off and varnish it.
What's the difference?
Hobbyists enjoy creating things out of wood. Professionals tend to focus on the quality. Hobbyists often take pride in the creations they make and often share them to family and friends. Professionals will spend hours looking at designs before they start to build a project. They will meticulously plan every detail of their work from choosing the right materials to finishing it.
What kind tools do carpenters use to build?
Carpenters use a hammer as their most common tool. A hammer can be used to drive nails into wood. It is also used to help hold pieces together while working on a job. Other tools include clamps.
Can I refinish furniture that I make?
Yes! There are plenty of ways to refinish old pieces of furniture without having to pay a pro. Here are some ideas:
Sandpaper can be used to remove stains and scratches. After that, use a clean towel to wipe the surface.
Apply clear polyurethane varnish. Before moving furniture, let dry completely.
Use acrylic paint to paint furniture.
Instead of using paint, stain is a better choice. The furniture will get a rich look with the stain.
Shellac wax is applied. This will protect and shine the wood.
What else should I know about woodworking in general?
It is easy to underestimate how much work it takes to make furniture. Finding the right kind of wood is the most difficult part. It can be hard to choose from the many types of wood that are available.
Another issue is that wood does not have the same properties. Some woods will warp over time, others will split or crack. You must take these things into consideration before purchasing wood.
Statistics
- If your lumber isn't as dry as you would like when you purchase it (over 22% in Glen Huey's opinion…probably over 10-15% in my opinion), then it's a good idea to let it acclimate to your workshop for a couple of weeks. (woodandshop.com)
- Most woodworkers agree that lumber moisture needs to be under 10% for building furniture. (woodandshop.com)
- Average lumber prices rose about 600 percent between April 2020 and May 2021. (familyhandyman.com)
- Woodworkers on the lower end of that spectrum, the bottom 10% to be exact, make roughly $24,000 a year, while the top 10% makes $108,000. (zippia.com)
External Links
How To
How to join wooden boards without using nails
Woodworking is an enjoyable hobby. It is relaxing and enjoyable because you can create something useful with wood. However, there are times when you want to join two pieces of wood together without having to use nails. This article will teach you how to do this to keep your woodwork projects looking great.
You will first need to trim the edges of your wood pieces before joining them. You don't want any sharp corners to cause problems later. After you have completed this step, you are ready to glue your boards together.
If you are working on hardwood, you should only use glue on one side. You should glue both sides if you are working with softwoods such as pine and cedar. Once the glue has dried, press the boards together until they are fully adhered. After applying the glue, let dry the boards before proceeding to the next stage.
After you glue your boards together, drill holes at the joints where screws will be inserted. These holes will differ depending on the type and size of screw you are using. If you plan to use a 1/2 inch wood screw, drill a hole at least 3/4 inches in depth.
After drilling the holes, you can drive the screws into your board's backside. Don't hit the board's surface. You could damage the finish. Don't drive the screws too far into the end. This will prevent the wood from splitting.
Protect your finished project now. You can either seal the entire piece of furniture or cover the top. Either way, you'll want to use a product that will last for years to come. Some examples include oil-based varnishes, polyurethane, shellac, lacquer, etc.
These products can be found in most home improvement shops. Just make sure that you buy the right kind for the job. Remember that some finishes can be toxic, so you should not use them indoors. Always wear protective gear when handling any of these finishes.